From Start To Finish: The Process Of Metal Roof Installation
Metal roof installation is a step-by-step process that involves more than just laying down panels. It starts with proper planning, moves through fabrication and prep, and finishes with detailed work that protects the building for years. A solid installation is what turns strong materials into a long-lasting roof that handles wind, rain, and heat.
Each part of the process matters. A mistake early on, like a wrong measurement or missed flashing, can cause headaches later. Let’s walk through how this kind of roofing is built, start to finish.
Planning and Measuring Come First
Every successful job begins with planning. A contractor will first inspect the structure of the home or building. They look at the pitch, roof shape, valleys, ridges, and any areas where water could collect. From there, they decide what materials to use and how much is needed.
Next comes the “cut-list.” This is a detailed sheet showing panel lengths, trim pieces, fasteners, and accessories. Measurements must be accurate. A roof panel cut too short is a waste. One cut too long may need to be redone.
Roofers also look at local building codes. In places like Miami, for example, materials must meet strict standards. Miami-Dade Approved products are often required for hurricane resistance. At this point, they’ll also check if any permits are needed before work begins.
Tear-Off or Lay-Over Decision
Now it’s time to decide: remove the old roof or install the new one over it?
If the old roof is damaged or made from incompatible materials (like crumbling shingles or wood shakes), it has to come off. That adds time, labor, and disposal. But it also gives the cleanest base for new work.
If the old roof is in decent shape, and building codes allow it, the metal roof can sometimes go over it. This saves time and money. Still, it only works in certain cases. Roofers make this call based on inspection and homeowner preference.
Underlayment and Barrier Installation
Before panels go up, a weather barrier is laid down. This underlayment adds a second layer of protection under the metal. It helps guard against leaks, condensation, and shifting panels.
There are different types. Some crews use synthetic underlayment, which resists tearing. Others go with peel-and-stick for areas like valleys and edges. Every inch of the deck should be covered before anything else is added.
Underlayment is fastened with cap nails or plastic caps. The install must be clean, wrinkle-free, and smooth. Bumps or folds under metal can be visible or cause water to pool.
Panel Fabrication and Delivery
Once measurements are locked in, panels are cut to size. Some companies, like Metal Master Shop, use in-house roll-forming machines. This means panels can be made fast, with precision, and on-site if needed.
Working with U.S.-made steel, these panels are custom-cut based on the cut-list. This includes ridge caps, drip edges, valleys, and starter strips. Color, profile, and length are all tailored to the project.
Fabricated pieces are bundled and sent to the job site. On arrival, everything gets inspected again. Nothing moves forward until all materials are confirmed.
Starter Strips, Trim, and Flashing Go First
Installation begins at the bottom and works up. First come the starter strips. These go along the eaves and help lock the first row of panels in place. They also block pests and rain from getting underneath the roof.
Then flashing gets installed around chimneys, vents, skylights, and valleys. Flashing is one of the most important steps. It guides water off the roof and keeps it from seeping into weak spots.
Trim pieces are also added to edges, gables, and hips. These clean up the look and help hold panels tight.
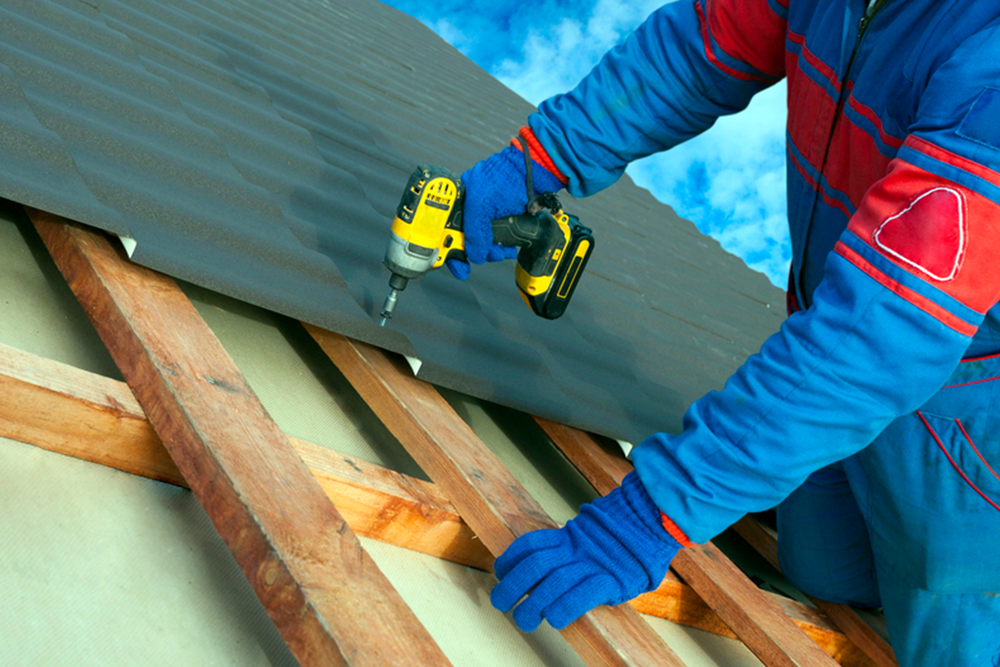
Panel Installation Begins
After flashing and trim are in place, the panel installation starts. Roofers usually begin at one corner and work their way across and up. Each panel is placed, aligned, and fastened using screws with rubber washers. These washers create a watertight seal at every point where metal meets the deck.
The panels must overlap correctly. A tight fit keeps water and wind out. Gaps between panels can cause leaks. Roofers check alignment row by row. A crooked panel early on can throw off the entire layout.
Some jobs use hidden fasteners, especially for standing seam panels. These give a cleaner look and reduce exposed screw heads. Others use exposed fasteners, which are quicker to install and common on simpler builds. Both methods work, but the decision depends on budget, roof design, and personal preference.
Ridges, Hips, and Final Trim Work
After panels cover the entire surface, the final step is sealing the top ridges and hips. Ridge caps run along the roof's peak and cover where the two sides meet. These are often vented to help airflow through the attic space.
Trim pieces are also added at corners and transitions. Every edge gets sealed with flashing or foam closures. These block wind, water, and small debris from slipping under the roof.
Sealant is used in key areas to protect seams. Fastener heads are double-checked. Any scratches in the panel finish get touched up with color-matched paint. The goal is not just a strong roof, but one that looks clean and finished.
Cleanup and Final Inspection
A proper metal roof installation includes a full job site cleanup. That means removing debris, sweeping for nails, and checking the gutters for material scraps. The team walks the roof and inspects each section. Every screw, flashing joint, and ridge is reviewed.
If any issues are found, they are fixed before the job is marked complete. Photos may be taken to document the work. At this point, the roof is ready to handle wind, rain, and the hot sun.
How Metal Master Shop Supports the Process
At Metal Master Shop, we work closely with contractors and homeowners at every step. From planning the cut-list to making sure the trim pieces match, we keep the process smooth. All of our roofing panels are fabricated from 100% U.S. steel in our Miami shop.
We also offer help with exporting to projects outside the U.S. That includes preparing material lists, assisting with logistics, and getting everything packed right. Our team knows what it takes to make installation easy, even across borders.
Ready to Get Started?
If you're planning a new roof, talk to us about your next metal roof installation. We’ll help you from panel selection to delivery, start to finish.